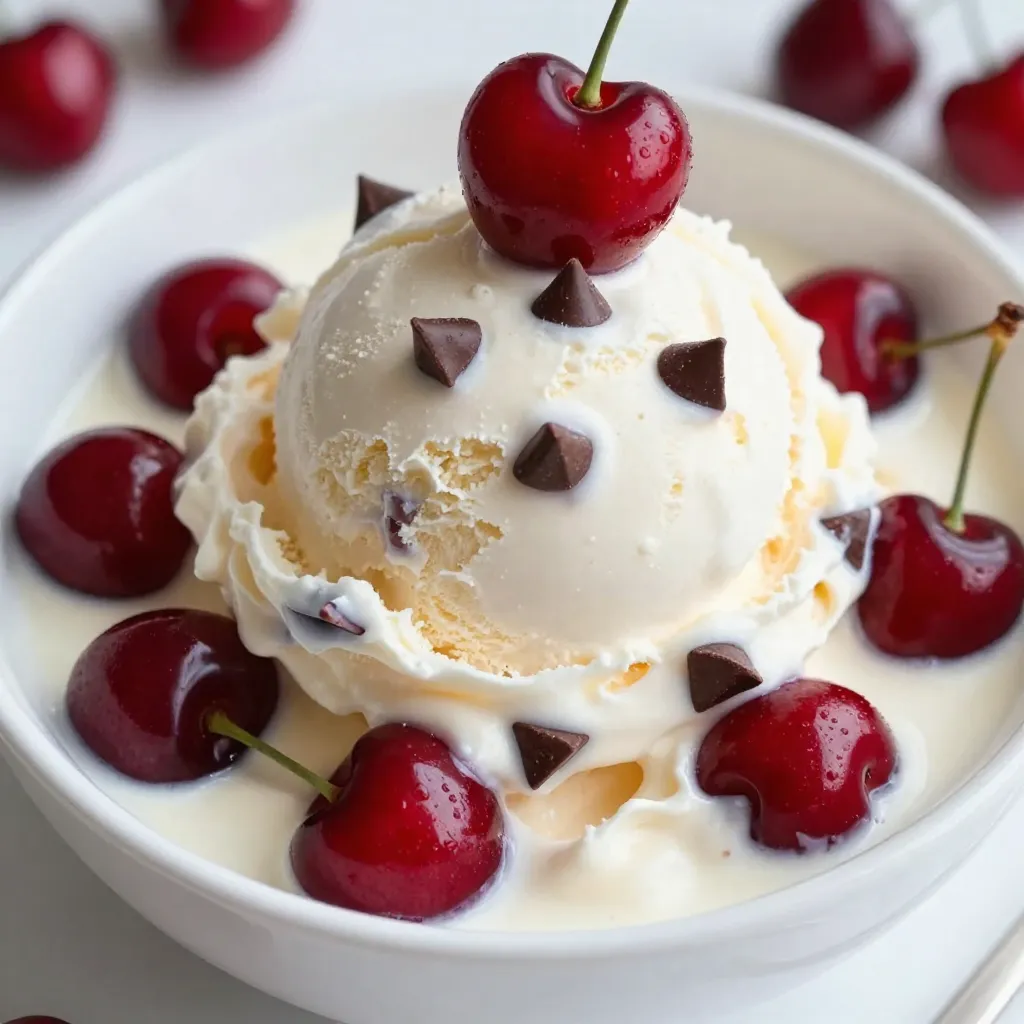
Indulge in a homemade treat that brings easy joy: Cherry Chocolate Chip Ice Cream! This delightful dessert combines sweet cherries and rich chocolate for a taste that’s hard to beat. In this guide, I’ll share simple steps for making this treat, from choosing the right cherries to achieving the perfect creaminess. Get ready to dive into a world of flavor that you can easily create at home!
Why I Love This Recipe
- Fresh and Fruity: The vibrant cherries provide a natural sweetness and a burst of flavor that perfectly complements the creamy base.
- Easy to Make: This recipe is straightforward and requires minimal ingredients, making it accessible for all skill levels in the kitchen.
- Chocolatey Delight: The addition of mini chocolate chips adds a delightful crunch and richness that elevates the ice cream experience.
- Perfect for Summer: This refreshing ice cream is an ideal treat for hot days, bringing a taste of summer into every scoop.
Ingredients
Detailed List of Ingredients
To make Cherry Chocolate Chip Ice Cream, gather these simple ingredients:
– 2 cups fresh cherries, pitted and halved
– 1 cup heavy cream
– 1 cup whole milk
– 3/4 cup granulated sugar
– 1 teaspoon vanilla extract
– 1/2 cup mini chocolate chips
– 1 tablespoon lemon juice
– Pinch of salt
These ingredients work together to create a creamy and fruity treat.
Ingredient Substitutions
You can swap some ingredients if needed. Here are a few ideas:
– Heavy cream: Use half-and-half for a lighter option.
– Whole milk: Almond or oat milk can work, but the texture may change.
– Granulated sugar: Try coconut sugar or honey for a different sweetness.
– Mini chocolate chips: Use dark chocolate chunks or white chocolate for fun twists.
These swaps help fit your tastes or dietary needs.
Types of Cherries to Use
Fresh cherries are best for this recipe. Here are the types you can consider:
– Sweet cherries: Bing cherries are juicy and sweet.
– Sour cherries: Tart Montmorency cherries can add a nice zing.
Make sure to pit and halve the cherries before using them. The flavor shines through in every scoop!

Step-by-Step Instructions
Preparing the Cherry Mixture
First, gather your fresh cherries. You will need two cups. Remove the pits and cut them in half. In a medium saucepan, combine the cherries, sugar, and a pinch of salt. Cook this mixture over medium heat for about five to seven minutes. Stir gently. You want the cherries to soften and release their juices. After cooking, remove the pan from heat. Add one tablespoon of lemon juice to brighten the flavor. Let the mixture cool for a bit. Then, blend it until smooth but keep some chunks for texture.
Whipping the Cream and Milk
Next, take a separate mixing bowl. Pour in one cup of heavy cream and one cup of whole milk. Add one teaspoon of vanilla extract for flavor. Whisk these ingredients together until they are fully combined. You want a smooth and creamy mixture. This step is key to getting a rich and tasty ice cream base.
Churning and Freezing Process
Now, it’s time to combine the two mixtures. Slowly add the cherry mixture into the cream mixture. Stir well until they blend completely. Pour this combined mixture into your ice cream maker. Churn according to your machine’s instructions, usually about 20 to 25 minutes. In the last few minutes, add half a cup of mini chocolate chips. This adds a delightful crunch. Once done, transfer the ice cream to an airtight container. Smooth the top before freezing it for at least four hours. This waiting time helps it firm up nicely. Enjoy your cherry chocolate chip ice cream in chilled bowls!
Tips & Tricks
How to Achieve the Creamiest Texture
To get the creamiest texture, start with cold ingredients. Use heavy cream and whole milk right from the fridge. The colder your base, the smoother your ice cream will be.
When you cook the cherry mixture, let it cool before blending. This helps keep the cream mixture cold when you combine them. Blend the cherries until smooth, but leave some small chunks. This adds fun texture.
Churning is key! Follow your ice cream maker’s instructions. Churn until it’s thick and fluffy. If the ice cream is too soft, freeze it longer.
Storing Leftover Ice Cream
If you have leftover ice cream, store it in an airtight container. Press a piece of wax paper on top before sealing. This helps prevent ice crystals from forming. Keep it in the back of the freezer. The back stays colder than the front.
Homemade ice cream is best if eaten within two weeks. After that, it may lose flavor or texture.
Serving Suggestions and Pairings
Serve your cherry chocolate chip ice cream in chilled bowls. This keeps it cold longer. Top with fresh cherries for a pop of color. Drizzle chocolate sauce over the top for extra sweetness.
Pair it with a slice of chocolate cake or a warm brownie. The warm treats balance the cold ice cream. You can even add whipped cream for a fun twist!
Pro Tips
- Use Frozen Cherries: If fresh cherries aren’t available, frozen cherries work well too. Just thaw and drain any excess liquid before using.
- Chill the Ice Cream Maker: Make sure your ice cream maker bowl is thoroughly chilled before pouring in the mixture for the best results.
- Experiment with Mix-Ins: Feel free to add other mix-ins like nuts or different types of chocolate chips for a personalized touch.
- Let it Ripen: For a firmer texture, let the ice cream sit in the freezer for a couple of hours after churning before serving.
Variations
Different Flavor Combinations
You can make this ice cream your own with fun flavors. Try adding a splash of almond extract for a nutty twist. You can also blend in some pureed strawberries for a fruity mix. For a more tropical vibe, consider coconut milk instead of cream. This can give you a light and creamy texture.
Dairy-Free Options
If you prefer dairy-free ice cream, swap the cream and milk. Use coconut cream and almond milk for a rich taste. You can also use cashew milk for creaminess. Add a bit of maple syrup for sweetness, and you’ll get a delightful treat.
Add-ins and Mix-ins Ideas
Mix-ins can take your ice cream to the next level. Consider adding crushed nuts like almonds or walnuts for crunch. You can also toss in some cookie dough pieces for a fun surprise. If you love a bit of heat, try a pinch of cayenne pepper for an exciting kick. Always remember to fold in your add-ins during the last few minutes of churning. This way, they mix evenly without breaking apart.
Storage Info
Best Practices for Storing Ice Cream
To keep your cherry chocolate chip ice cream fresh, use an airtight container. This helps prevent ice from forming. Fill the container to the top to limit air exposure. You can also place a piece of parchment paper directly on the ice cream’s surface. This adds an extra layer of protection.
How Long Can You Keep Homemade Ice Cream?
Homemade ice cream lasts about two weeks in the freezer. After that, it may lose its texture and flavor. If you notice it becoming too icy or hard, it’s best to eat it sooner. Always check the taste and texture before enjoying.
Signs That Ice Cream Has Gone Bad
Look for any changes in color or texture. If you see ice crystals, that means it may not be fresh. A sour smell or off taste are also clear signs. If you notice any of these signs, it’s best to toss the ice cream. Always prioritize your health when it comes to food safety.
FAQs
Can I use frozen cherries instead of fresh?
Yes, you can use frozen cherries. They work well in this recipe. Just remember to thaw them first. Drain any excess liquid before cooking. This helps keep your ice cream from being too watery. Frozen cherries may be sweeter since they are often picked at peak ripeness. Adjust the sugar in your recipe if needed.
How do I prevent ice crystals in my ice cream?
To keep ice crystals away, use heavy cream and whole milk. They provide fat, which helps create a smooth texture. Churning the mixture properly in your ice cream maker is key. The more you churn, the creamier it gets. Also, make sure to freeze your ice cream in a cold container. This helps it freeze faster and stay smooth.
What ice cream maker is the best for home use?
I recommend a compressor ice cream maker for ease and speed. These machines do not need pre-freezing. You can make batch after batch without waiting. If you prefer a less expensive option, a bowl-style maker works too. Just remember to freeze the bowl in advance. Look for a model with a good warranty and positive reviews.
This blog post covers how to make cherry ice cream from scratch. We discussed the ingredients you need and offered substitutions. You learned about preparing the cherry mixture and whipping the cream. I shared tips for getting a creamy texture and storing your ice cream. We also explored variations and answered common questions.
Homemade cherry ice cream is fun and rewarding to make. Enjoy crafting this treat for family and friends. Your efforts will surely impress everyon