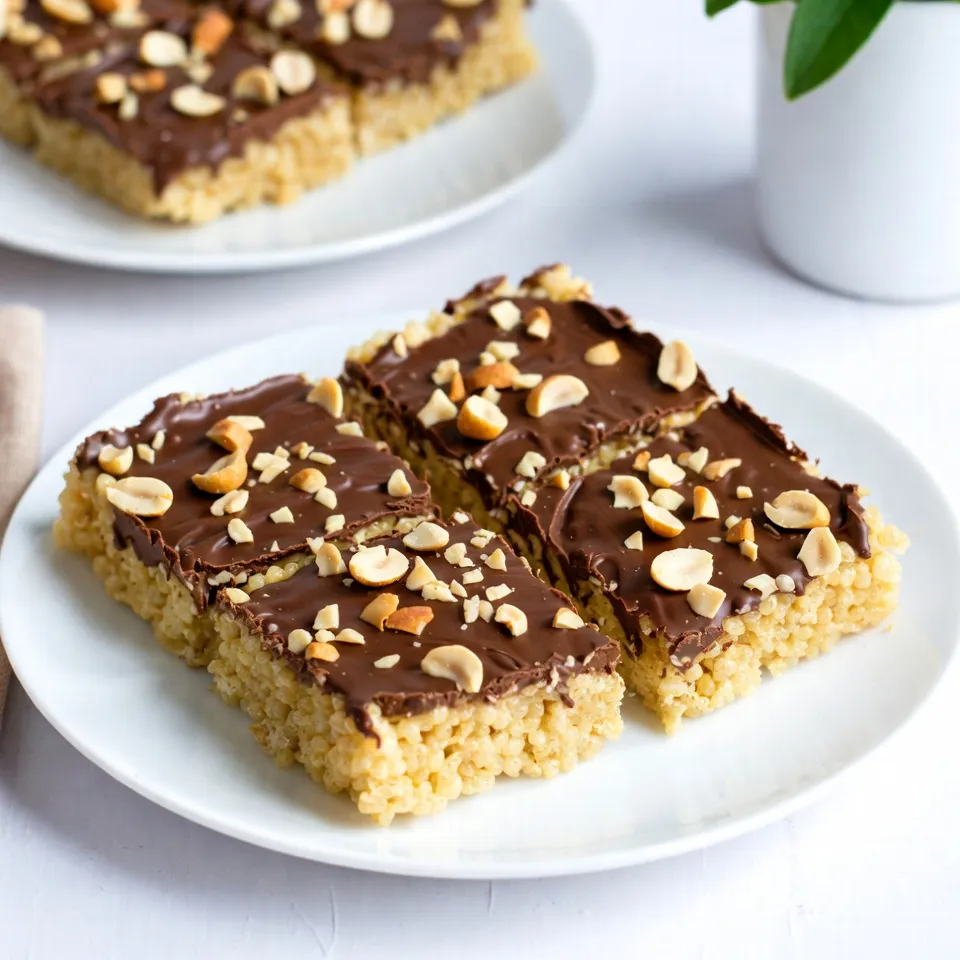
Are you ready for a sweet treat that combines the best of chocolate and peanut butter? In this post, I’ll guide you through making Chocolate Peanut Butter Rice Krispie Treats that are easy and fun to prepare. With simple ingredients and straightforward steps, you’ll impress your family and friends with these gooey delights. Let’s dive in and discover how to create this crunchy, creamy, and delicious dessert!
Why I Love This Recipe
- Quick and Easy: This recipe takes just 15 minutes to prepare, making it perfect for a last-minute treat.
- Irresistible Flavor Combination: The blend of chocolate and peanut butter is a classic that everyone loves.
- No-Bake Delight: These treats require no baking, which means less hassle and more fun!
- Customizable: You can easily add your favorite nuts or toppings to make them uniquely yours.
Ingredients
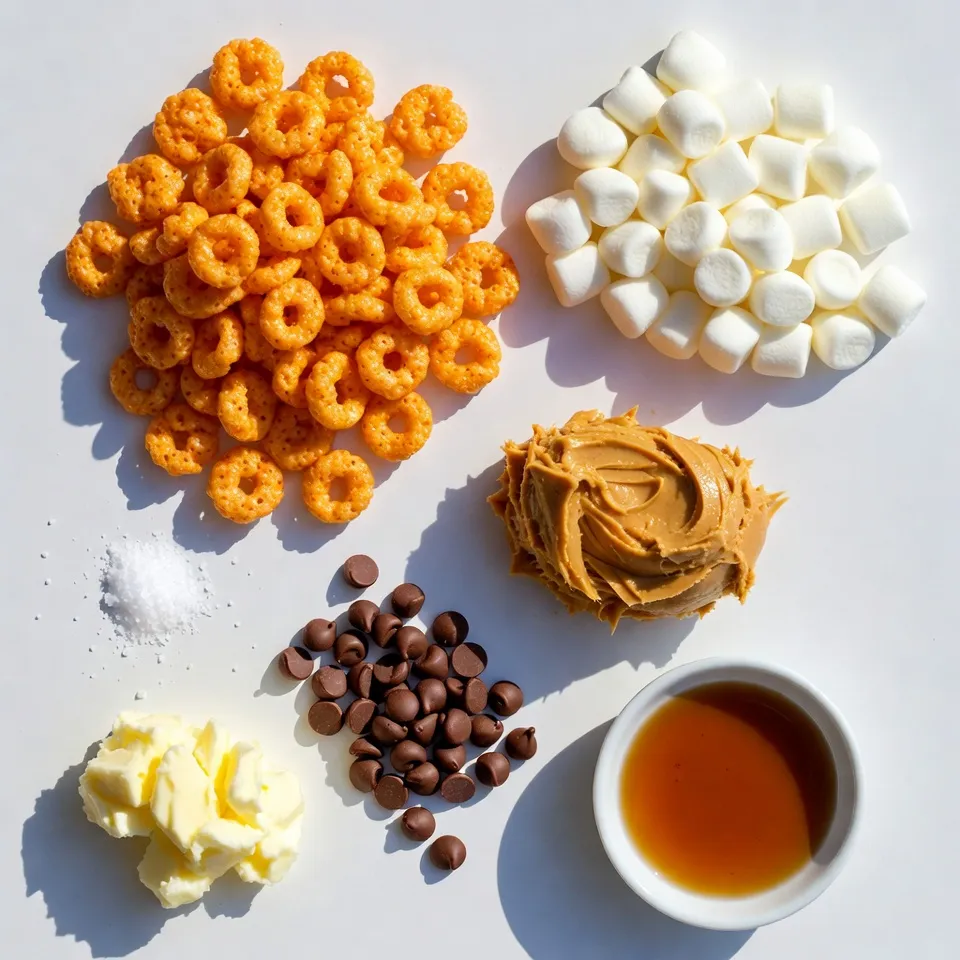
To make Chocolate Peanut Butter Rice Krispie Treats, you need a few key ingredients. Each one plays a big role in the flavor and texture of the treats. Here’s what you’ll need:
– 4 cups Rice Krispies cereal
– 1 cup mini marshmallows
– 1/2 cup creamy peanut butter
– 1/2 cup milk chocolate chips
– 1/4 cup unsalted butter
– 1/2 teaspoon vanilla extract
– Pinch of salt
Each ingredient adds something special. The Rice Krispies give a nice crunch. The mini marshmallows add sweetness and chewiness. Creamy peanut butter gives a rich, nutty flavor. Milk chocolate chips make it extra sweet and yummy. Unsalted butter helps bind everything together. Vanilla extract enhances the flavors, while a pinch of salt balances the sweetness.
Gather these ingredients before you start. It makes cooking easier and more fun. You’ll see how they come together to create a delightful treat!
Step-by-Step Instructions
Preparing the Pan
To start, you need to prepare your pan. You can either grease a 9×13 inch baking dish with butter or line it with parchment paper. Greasing helps but can be messy. Parchment paper makes it easy to lift the treats out later. I prefer parchment paper for easy removal and clean-up.
Melting the Butter and Peanut Butter
Next, you will melt the butter and peanut butter. Use a large saucepan over low heat. Stir the mixture until it becomes smooth. Keep an eye on it so it does not burn. This part is key for a creamy treat.
Adding the Marshmallows
Once your butter and peanut butter mix is smooth, it’s time to add the mini marshmallows. Stir them in right away. Keep stirring until they melt completely. This step gives the treats their soft and gooey texture.
Combining with the Rice Krispies
After the marshmallows melt, remove the pan from heat. Gently fold the Rice Krispies into the mixture. Be careful not to crush the cereal. This keeps your treats light and crispy.
Incorporating Vanilla and Salt
Now, mix in the vanilla extract and a pinch of salt. The vanilla adds flavor, and salt balances the sweetness. Just a small pinch makes a big difference in taste.
Spreading the Mixture
Pour the mixture into your prepared pan. Use a spatula to spread it evenly. Press it down gently. You want the mixture to be even but not squished. This helps the treats hold together better.
Melting and Spreading the Chocolate
For the chocolate, use a microwave-safe bowl. Melt the milk chocolate chips in 30-second intervals. Stir between each interval until smooth. Be patient; it will melt perfectly.
Setting the Treats
Once you spread the melted chocolate over the treats, let them set. You can leave them at room temperature or put them in the fridge for a quick set. Once the chocolate hardens, cut the treats into squares or rectangles. Now you’re ready to enjoy your delicious creation!
Tips & Tricks
How to Perfect Your Treats
To get the best results, watch your cooking temperatures. When melting butter and peanut butter, keep the heat low. This helps them blend smoothly. If the heat is too high, the mixture can burn. Aim for a gentle melt, just enough to mix well.
Serving Suggestions
Presentation is key for gatherings. Cut the treats into even squares. Place them on a colorful platter. You can add a fun twist by sprinkling crushed peanuts or chocolate shavings on top. This little touch makes them look fancy.
Common Mistakes to Avoid
Avoid crushing the Rice Krispies. When you fold them into the marshmallow mix, be gentle. If you press too hard, they will lose their crunch. Another mistake is not letting the treats set properly. If you cut them too soon, they will fall apart. Give them enough time to cool and harden.
Pro Tips
- Use Fresh Ingredients: Ensure your marshmallows and peanut butter are fresh for the best flavor and texture.
- Don’t Overheat the Chocolate: When melting chocolate, do it in short intervals to prevent scorching and ensure a smooth finish.
- Let it Cool Completely: Allow the Rice Krispie treats to cool completely before cutting them to ensure they hold their shape.
- Experiment with Toppings: Feel free to add toppings like crushed nuts or sprinkles to customize your treats and make them visually appealing.
Variations
Adding Different Mix-Ins
You can make your chocolate peanut butter rice krispie treats even better with mix-ins. Here are some ideas:
– Nuts: Add chopped peanuts, almonds, or walnuts for a crunchy bite.
– Candies: Toss in mini M&Ms, chocolate chunks, or even crushed cookies for fun textures.
– Flavor Additions: Try a sprinkle of cinnamon or a dash of sea salt on top to enhance the taste.
These mix-ins give your treats a fun twist. You can mix and match based on what you love!
Alternative Chocolate Options
Switching up the chocolate can change your treats’ flavor. Here’s how:
– Dark Chocolate: Use dark chocolate chips for a richer taste. It pairs well with peanut butter.
– White Chocolate: White chocolate gives a sweet, creamy contrast. It’s a great choice if you want something different.
Feel free to experiment with these chocolate options to find your favorite.
Gluten-Free Options
If you need a gluten-free version, it’s simple! Just make sure to use gluten-free rice cereal. Check the label to confirm it’s certified gluten-free. This way, everyone can enjoy your delicious treats without worry.
Storage Info
Best Ways to Store
To keep your Chocolate Peanut Butter Rice Krispie Treats fresh, store them in an airtight container. You can keep them at room temperature or in the fridge. Keeping them at room temperature makes them soft and chewy. Refrigeration can make them firmer. If you prefer them chewy, room temperature is best.
Shelf Life
These treats last about 3 to 5 days at room temperature. If you store them in the fridge, they can last up to a week. Just check for any signs of drying out. If they start to feel hard, it’s time to refresh them.
Reheating Tips
If your treats harden, don’t worry! You can easily refresh them. Place them in the microwave for about 10 seconds. This softens them up nicely. Just be careful not to overheat. You want them warm but not melted. Enjoy them soft and gooey again!
FAQs
Can I use crunchy peanut butter?
Yes, you can use crunchy peanut butter. It adds a nice texture and flavor. The bits of peanut will give a fun crunch. Just keep in mind the treats might be less smooth.
Can I make these without butter?
Absolutely! You can use coconut oil or margarine instead. These substitutes will still help bind the mix. They may change the flavor a bit, but they work well.
What can I do if the mixture is too sticky?
If your mixture is too sticky, try adding more Rice Krispies. This will help absorb some of the stickiness. You can also use a bit of oil on your hands for easier handling.
Are these treats suitable for freezing?
Yes, these treats freeze well! Wrap them tightly in plastic wrap or foil. When ready to eat, thaw them in the fridge overnight for the best taste and texture.
How do I cut the treats neatly?
To cut the treats neatly, use a sharp knife. Lightly grease the knife to prevent sticking. Cut them while they are still slightly warm for cleaner edges.
You now have all you need to make delicious Rice Krispies treats. We covered the key ingredients, step-by-step instructions, and helpful tips. Remember to melt your butter and peanut butter carefully. Avoid common mistakes for the best results. Explore variations like adding nuts or trying different chocolate. Proper storage helps keep your treats fresh. Enjoy making and sharing these sweet snack