Craving something sweet without the hassle of baking? I’ve got the perfect solution: No-Bake Cheesecake Jars! These simple and tasty treats are not just easy to make, but they’re also a hit for any occasion. In this post, I’ll guide you through the ingredients, step-by-step instructions, and tips to create your delicious dessert. Let’s dive in and whip up some creamy goodness that everyone will love!
Why I Love This Recipe
- Easy to Make: This no-bake cheesecake is simple and quick to prepare, making it perfect for any occasion.
- Individual Servings: Serving the cheesecake in jars not only looks beautiful but also makes portion control easy.
- Customizable: You can switch up the toppings and flavors according to your preferences, making each jar unique.
- Light and Creamy: The combination of cream cheese and Greek yogurt gives this cheesecake a light and fluffy texture that is irresistible.
Ingredients
Main Ingredients
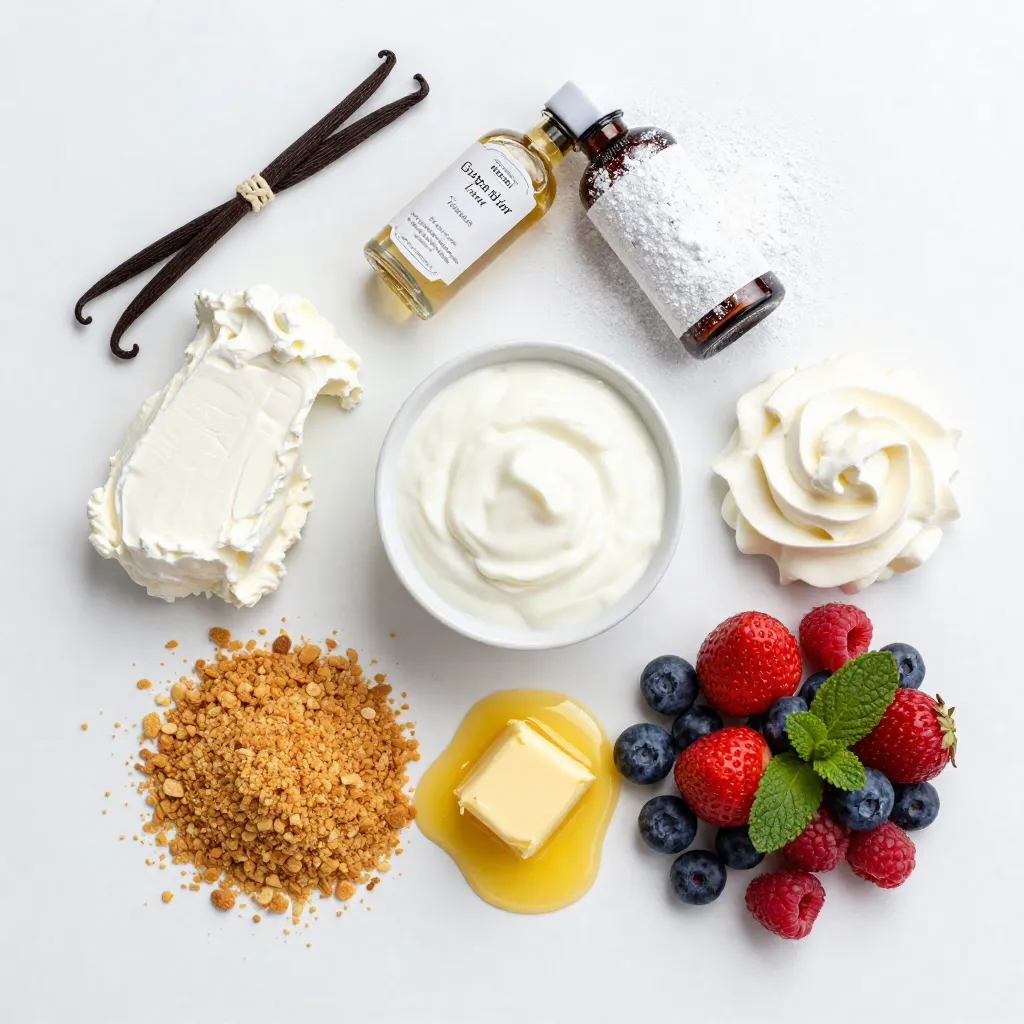
For a tasty no-bake cheesecake jar, gather these key items:
– 1 cup cream cheese, softened
– ½ cup Greek yogurt
– ½ cup powdered sugar
– 1 teaspoon vanilla extract
– 1 cup heavy whipping cream
– 1 cup graham cracker crumbs
– 4 tablespoons melted butter
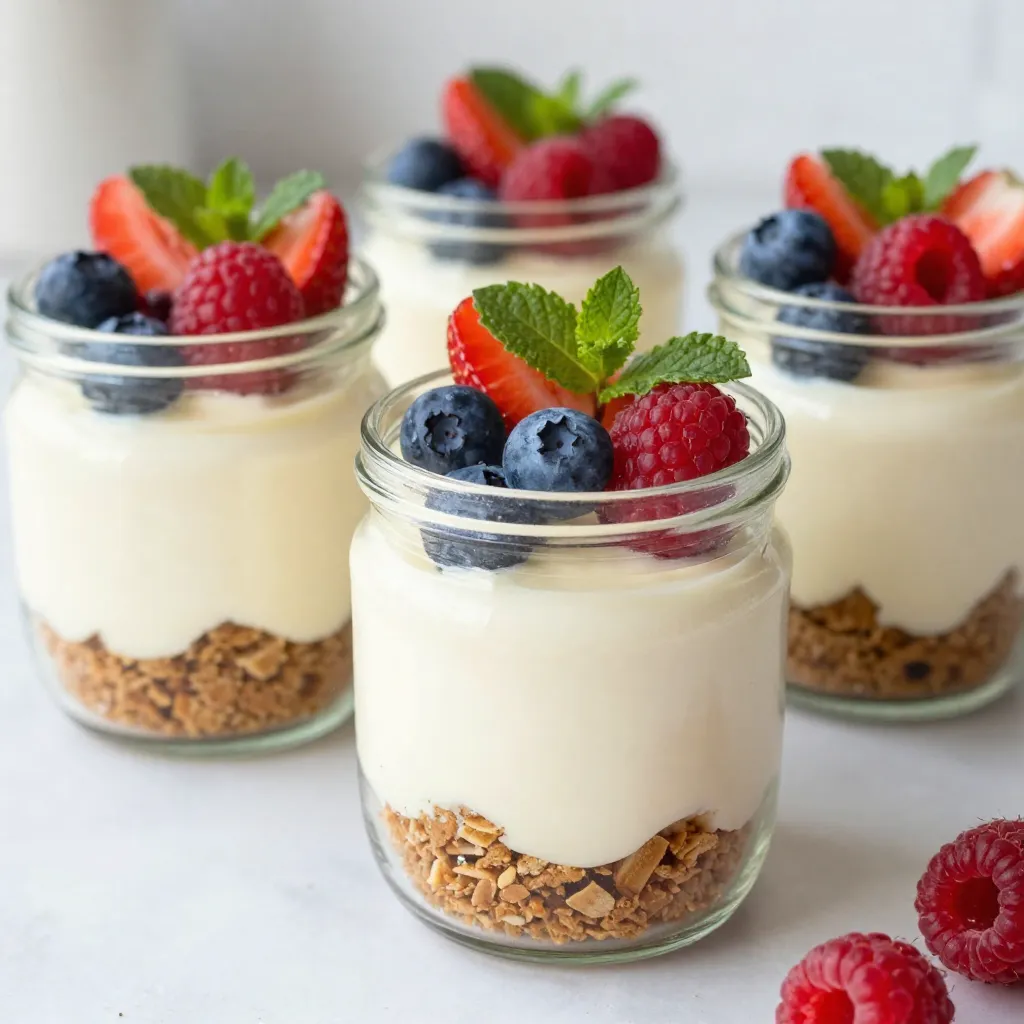
– 1 cup mixed berries (strawberries, blueberries, raspberries)
These ingredients create a rich and creamy dessert that is easy to make. The cream cheese and Greek yogurt give the cheesecake a smooth texture. The whipped cream adds lightness, making it perfect for a warm day.
Optional Garnishes
You can enhance your cheesecake jars with some fun garnishes:
– Fresh mint leaves
– Additional mixed berries
– A drizzle of berry sauce or honey
These toppings not only add flavor but also make your jars look beautiful. A sprinkle of mint leaves can add a fresh touch.
Equipment Needed
To make these jars, you will need a few simple tools:
– Mixing bowls
– Electric mixer
– Measuring cups
– A spoon or spatula
– Small jars for serving
Having the right tools makes this process smoother. You can use any small jars you have at home to serve your cheesecake. They can be glass or plastic, whatever you prefer!
Step-by-Step Instructions
Preparing the Cheesecake Filling
To make the filling, start with a bowl. Add 1 cup of softened cream cheese, ½ cup of Greek yogurt, ½ cup of powdered sugar, and 1 teaspoon of vanilla extract. Mix these with an electric mixer until smooth and creamy. This step is key for a rich texture in your cheesecake. Then, in another bowl, whip 1 cup of heavy cream until it forms stiff peaks. This makes your dessert light and fluffy. Gently fold the whipped cream into the cream cheese mixture. Be careful not to deflate the whipped cream too much. You want to keep that airy feel.
Making the Graham Cracker Crust
Now it’s time for the crust. In a separate bowl, mix 1 cup of graham cracker crumbs with 4 tablespoons of melted butter. Stir until all the crumbs are coated. This crust adds a nice crunch to your jars. You can use a fork to break up any large clumps.
Assembling the Cheesecake Jars
Start assembling your jars by adding a layer of the graham cracker mixture at the bottom of each jar. Press it down gently to make it compact. Next, spoon in a layer of the cheesecake filling. Smooth it out with the back of a spoon. Then, add a layer of mixed berries on top of the filling. You can use strawberries, blueberries, or raspberries. Repeat these layers until the jars are filled. Finish with a layer of cheesecake filling on top. Chill the jars in the fridge for at least 2 hours. This helps the cheesecake set. Before serving, feel free to add more berries and a mint leaf for a fresh look.
Tips & Tricks
Ensuring Smooth Mixture
To get that creamy texture, mix the cream cheese well. Start with softened cream cheese. This makes blending easier. Add Greek yogurt for creaminess. Beat until it feels smooth. Use an electric mixer for best results. Mixing by hand can leave lumps. Add powdered sugar and vanilla for sweetness. Make sure everything is combined well. A smooth mixture gives a better taste.
Perfecting Whipped Cream
Whipping cream adds air and lightness. Use cold heavy cream for best results. Beat it until stiff peaks form. This means it holds its shape. Be gentle when folding it into the cream cheese mix. You want the air to stay in the whipped cream. This keeps your cheesecake light and fluffy. Avoid overmixing, or it will lose its fluffiness.
Layering Aesthetics
Layers make your jars look pretty. Start with a graham cracker layer at the bottom. Press it down gently to form a crust. Next, add the cheesecake filling. Smooth it with the back of a spoon. This helps the layers stay neat. Add a layer of mixed berries on top. Repeat these layers for a colorful look. Finish with cheesecake filling and berries on top. This creates a visually appealing treat.
Pro Tips
- Use Room Temperature Ingredients: Ensure your cream cheese and Greek yogurt are at room temperature for a smoother filling.
- Whip Cream to Stiff Peaks: Whipping the cream to stiff peaks adds lightness and volume to the cheesecake filling.
- Layering Technique: When layering, press each layer down gently to ensure the jars are packed nicely and look visually appealing.
- Chill Time Matters: Allow the jars to chill for at least 2 hours to set properly, enhancing the flavors and texture.
Variations
Flavor Options
You can change the flavor of your no-bake cheesecake jars easily. Here are some ideas:
– Chocolate: Add cocoa powder to the cream cheese mix.
– Lemon: Mix in lemon juice and zest for a fresh taste.
– Coffee: Stir in instant coffee granules for a coffee twist.
– Pumpkin: Use pumpkin puree and spices for a fall flavor.
Experimenting with flavors makes this treat fun and unique!
Alternative Toppings
Toppings can take your jars to the next level. Try these options:
– Chocolate Shavings: Sprinkle over the top for a rich finish.
– Caramel Sauce: Drizzle on top for sweetness and depth.
– Nut Crumbles: Add chopped nuts for crunch and texture.
– Coconut Flakes: Use unsweetened coconut for a tropical feel.
Mix and match to create your perfect dessert!
Dietary Modifications
You can modify this recipe to fit dietary needs. Here are some alternatives:
– Gluten-Free: Use gluten-free graham crackers or nuts for the crust.
– Dairy-Free: Substitute cream cheese and yogurt with plant-based options.
– Sugar-Free: Use a sugar substitute in place of powdered sugar.
These adjustments keep your cheesecake jars delicious while meeting dietary needs.
Storage Info
Best Storage Practices
Store your no-bake cheesecake jars in the fridge. Use an airtight container to keep them fresh. If you stack jars, place parchment paper between them. This helps prevent sticking. Always cover the jars with plastic wrap if you don’t have a lid.
Shelf Life
These cheesecake jars last about 3 to 5 days in the fridge. After that, they may lose their texture and taste. Make sure to check for any signs of spoilage before eating. If you see any mold, throw it away.
Freezing Instructions
You can freeze these jars, but they might change in texture. To freeze, allow the jars to cool completely. Cover them tightly with plastic wrap and then foil. They can last for up to 2 months in the freezer. When you’re ready to eat, move them to the fridge overnight to thaw. Do not refreeze once thawed.
FAQs
Can I use different bases instead of graham crackers?
Yes, you can use other bases. Some great options are crushed cookies or cake crumbs. Try using Oreos for a rich flavor. You can also use shortbread or even nuts for a gluten-free version. Each base brings its own unique taste and texture to the jar.
How long do no-bake cheesecake jars last in the fridge?
No-bake cheesecake jars stay fresh in the fridge for about 3 to 5 days. Make sure to cover them tightly. This keeps the flavors intact and prevents them from drying out. Always check for freshness before serving.
Can I make no-bake cheesecake jars in advance?
Absolutely, you can make them ahead of time. Preparing them a day before serving works well. This allows the flavors to meld, making the cheesecake even tastier. Just remember to refrigerate them until you’re ready to enjoy.
This article covered everything you need to know about no-bake cheesecake jars. We looked at main ingredients, optional garnishes, and the equipment needed. You learned simple steps to prepare the filling, make the crust, and assemble the jars. Plus, I shared tips for a smooth mixture and perfect layered looks. We explored flavor variations and how to store your treats.
No-bake cheesecake jars are fun and easy to make. Enjoy creating your own tasty version