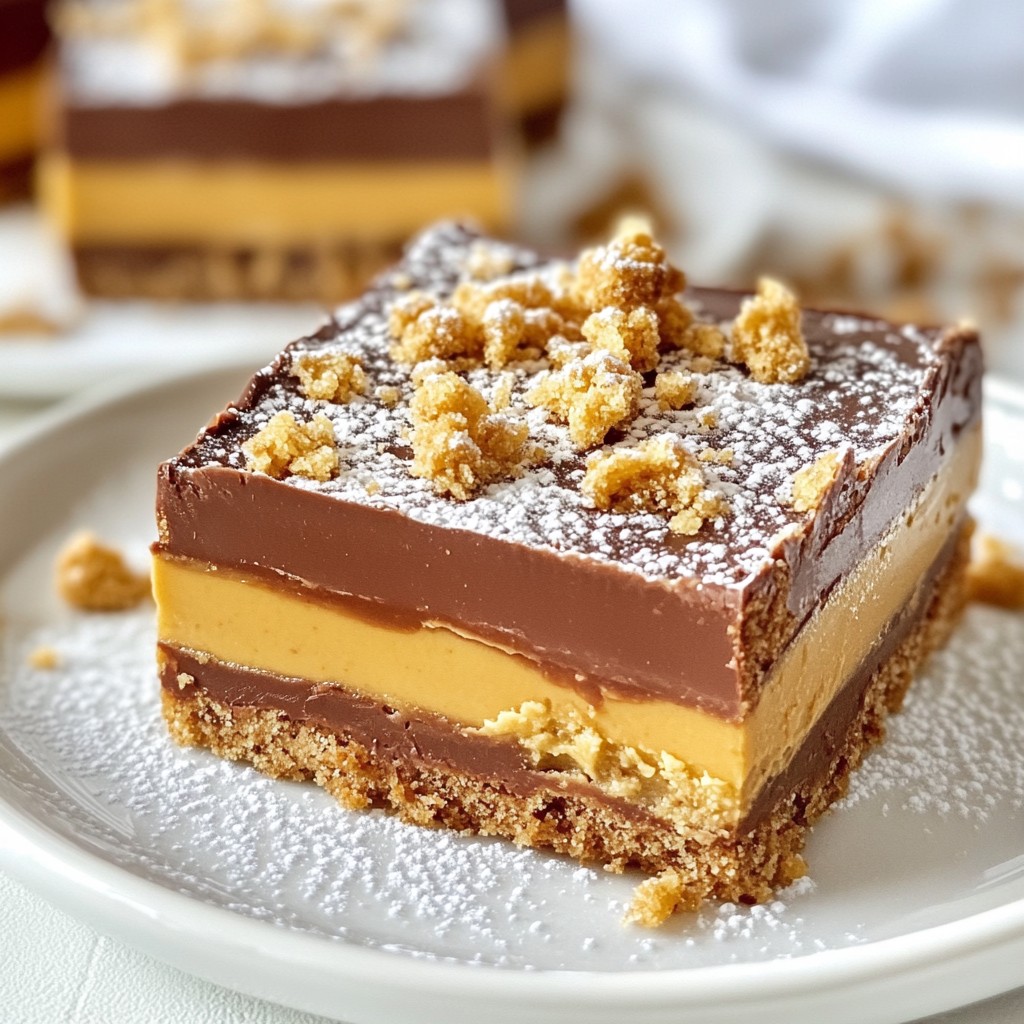
If you crave a sweet treat but lack baking skills, these No-Bake Cookie Butter Bars are perfect for you! With easy steps and simple ingredients, you can whip up a delicious dessert in no time. You’ll love how creamy and crunchy these bars are! Plus, I’ll share tips for storage and fun variations to keep things exciting. Let’s dive into this simple, tasty delight that you won't want to miss!
Why I Love This Recipe
- Quick and Easy: This recipe requires no baking, making it a hassle-free treat that can be whipped up in just 15 minutes.
- Deliciously Indulgent: The combination of cookie butter and chocolate creates a rich and satisfying flavor that’s hard to resist.
- Customizable: Feel free to add your favorite toppings, such as crushed cookies or nuts, to make these bars uniquely yours.
- Perfect for Sharing: With 12 servings, these bars are great for parties, potlucks, or simply enjoying with family and friends.
Ingredients
List of Ingredients
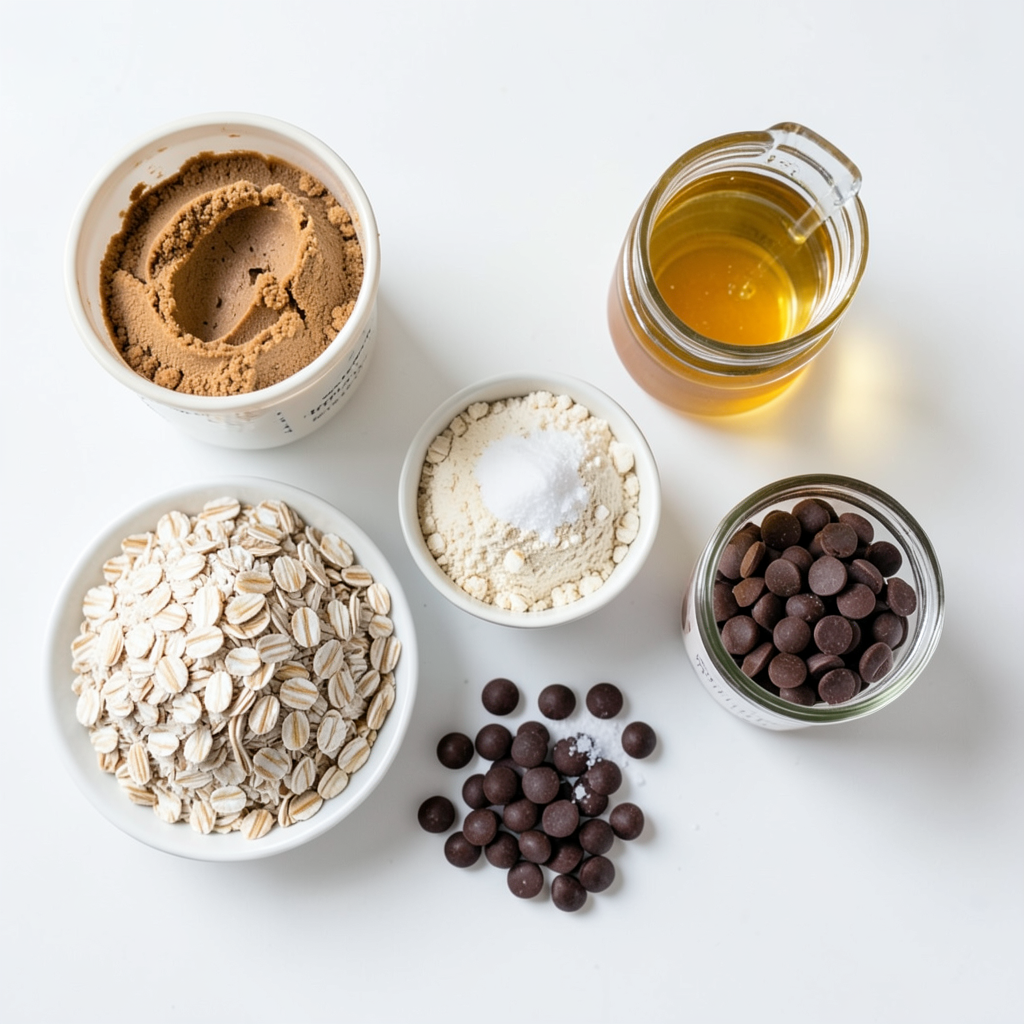
- 1 cup cookie butter
- 1 cup rolled oats
- 1/2 cup almond flour
- 1/2 cup honey or maple syrup
- 1/4 cup coconut oil, melted
- 1 cup chocolate chips (milk or dark)
- 1/4 teaspoon sea salt
- 1/2 teaspoon vanilla extract
Measurement and Substitutions
For this recipe, you can swap honey for maple syrup if you want it vegan. Almond flour can change with oat flour or even all-purpose flour. If you don’t have cookie butter, try sun butter or a nut butter instead.
Optional Toppings
You can make these bars even more fun with toppings! Consider using:
- Crushed cookies for crunch
- Chopped nuts for added protein
- A drizzle of melted chocolate for sweetness
These options add flavor and texture to the bars. Feel free to mix and match to find your favorite combo!
Step-by-Step Instructions
Preparation Overview
To make no-bake cookie butter bars, start with easy steps. Gather all your ingredients first. This makes mixing fun and quick. You will need cookie butter, oats, almond flour, honey or maple syrup, melted coconut oil, chocolate chips, sea salt, and vanilla extract. Prepping these items helps you stay organized.
Mixing Wet and Dry Ingredients
In a large mixing bowl, add the cookie butter, honey (or maple syrup), melted coconut oil, and vanilla extract. Stir these together until the mix is smooth. In another bowl, mix the rolled oats, almond flour, and sea salt. Blend until they are well combined. Slowly add the dry mix to the wet mix. Stir until it all comes together. The mix should feel thick but easy to handle.
Assembling the Bars
Line an 8x8 inch baking dish with parchment paper. Leave some paper hanging over the sides. This will help you lift the bars out later. Press the mixture evenly into the dish. Use your hands or a spatula to smooth it out. Now, melt the chocolate chips in a microwave-safe bowl. Heat in 30-second bursts, stirring each time until smooth. Pour the melted chocolate over the pressed mixture. Spread it evenly with a spatula. If you like, sprinkle crushed cookies or chopped nuts on top while the chocolate is warm. Next, place the dish in the fridge for at least 2 hours. This helps the bars set. Once firm, lift them out using the parchment. Cut into squares or rectangles and enjoy!
Tips & Tricks
Storing Tips for Freshness
To keep your no-bake cookie butter bars fresh, store them in an airtight container. This keeps them moist and tasty. You can place parchment paper between the bars to avoid sticking. These bars last up to one week in the fridge. If you want to keep them longer, consider freezing them. Just wrap each bar in plastic wrap before placing them in a freezer-safe bag. They will stay good for about three months in the freezer.
Common Mistakes to Avoid
One common mistake is not letting the mixture cool before adding chocolate. If the mixture is too warm, the chocolate can melt too fast. Another mistake is not pressing the mixture firmly enough into the dish. This can lead to crumbly bars. Also, don't skip the sea salt. It enhances the flavor and balances the sweetness. Lastly, be careful with the measurements. Too much or too little of any ingredient can change the texture.
Enhancing Flavor and Texture
To elevate the flavor of your bars, try adding spices like cinnamon or nutmeg. These spices pair well with cookie butter. If you want extra crunch, mix in nuts or seeds. For a fun twist, you can use different types of cookie butter, like chocolate or speculoos. For added sweetness, drizzle honey or more melted chocolate on top. You can even sprinkle crushed cookies or nuts as a topping before the chocolate hardens. These small changes can make a big impact on your bars.
Pro Tips
- Chill Your Ingredients: Ensure that your coconut oil is fully melted and that the cookie butter is at room temperature for easier mixing.
- Customize Your Sweetener: Feel free to swap honey for agave syrup or maple syrup, depending on your dietary preferences or desired flavor profile.
- Add Texture: For an extra crunch, incorporate a mix of seeds like chia or flaxseed into the base mixture before pressing it into the pan.
- Storage Tips: Store your cookie butter bars in an airtight container in the fridge for up to a week for optimal freshness.
Variations
Flavor Swaps
You can change the cookie butter type to mix up the flavor. Try different brands or flavors of cookie butter. Each type brings a unique taste. For example, speculoos cookie butter gives a spicy flavor. Nut-based butters like pistachio can add richness. You can even use chocolate cookie butter for a sweet twist.
Alternative Sweeteners
If you want to use different sweeteners, choose what suits you best. Honey is great, but maple syrup works well too. You can also use agave nectar or coconut sugar for a different taste. Each sweetener changes the texture and flavor slightly. Just remember to adjust the amount for your preference.
Mix-ins for Added Crunch
Adding mix-ins can make your bars more fun. Chopped nuts like almonds or walnuts add a nice crunch. You can also sprinkle in seeds like chia or flaxseeds for extra nutrition. Dried fruit, like cranberries or raisins, can give a sweet surprise. These extras not only add texture but also boost the flavor profile.
Storage Info
Best Storage Practices
To keep your no-bake cookie butter bars fresh, store them in an airtight container. Use parchment paper to separate the layers if you stack them. This helps prevent sticking. Place the container in the fridge to maintain flavor and texture. Avoid exposing them to heat or moisture.
Freezing Instructions
You can freeze these bars for long-lasting enjoyment. First, let them cool completely. Then, cut them into squares or rectangles. Wrap each piece in plastic wrap and place them in a freezer-safe bag. This way, you can grab a treat anytime! When ready to eat, thaw them in the fridge for a few hours.
Shelf Life Information
These no-bake cookie butter bars last about one week in the fridge. If you freeze them, they can last for up to three months. Always check for any signs of spoilage before eating. If they look or smell off, it’s best to toss them. Enjoy your treats while they are fresh!
FAQs
Can I use other nut flours?
Yes, you can use other nut flours like cashew or hazelnut. Each will add a unique flavor. Just make sure the nut flour is finely ground. This helps the bars hold together better. If you prefer a nut-free option, consider using oat flour instead. It keeps the texture smooth and tasty.
How do I make these bars vegan?
To make these bars vegan, simply swap honey for maple syrup. This keeps the sweetness while staying plant-based. Also, choose dairy-free chocolate chips for the topping. Check the labels to ensure they are vegan-friendly. Using coconut oil is a great choice since it is already vegan.
What can I substitute for cookie butter?
You can use almond butter or peanut butter in place of cookie butter. Both options add creaminess and flavor. However, the taste will change slightly. If you want a sweeter option, try sunbutter. This works well and is nut-free, which is great for allergies.
In this article, we covered key ingredients and precise measurements for your bars. I shared tips to avoid common mistakes and enhance flavor. Variations let you experiment with different flavors and sweeteners. Proper storage keeps your bars fresh and tasty.
Remember, making these bars is easy and fun. You can customize them to your taste and share them with friends. Enjoy the process and the delicious rewards.