Get ready to indulge in a sweet treat that’s perfect for any occasion—No Bake Oreo Truffles! These little bites of creamy chocolate delight are simple to make and even easier to devour. With just a handful of ingredients, including Oreos and cream cheese, you’ll whip up a delicious dessert in no time. Follow me as I guide you step by step through this easy recipe that everyone will love!
Why I Love This Recipe
- Decadent Flavor: These truffles combine the rich taste of chocolate with the classic Oreo flavor, creating a delightful treat that satisfies any sweet tooth.
- Simple Preparation: With just a few ingredients and straightforward steps, making these truffles is easy and fun, even for beginners!
- Versatile Garnish: You can customize the toppings with sprinkles, crushed Oreos, or even nuts, making each batch unique and visually appealing.
- Perfect for Any Occasion: These truffles are great for parties, holidays, or just a special treat at home, making them a versatile dessert option.
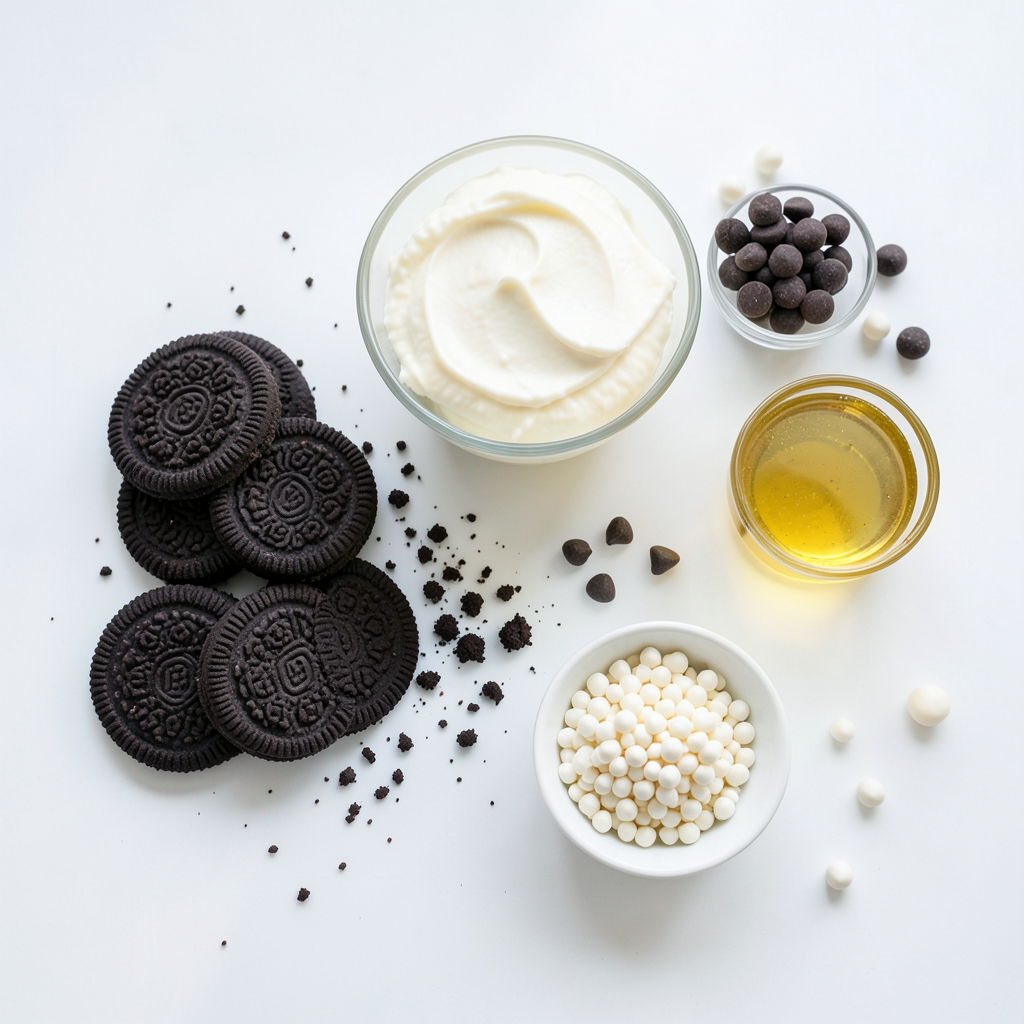
Ingredients
List of Ingredients
- 36 Oreo cookies, crushed
- 8 oz cream cheese, softened
- 1 cup semi-sweet chocolate chips
- 1 tablespoon coconut oil (optional, for smooth melting)
- 1/2 cup white chocolate chips (for drizzling)
- Sprinkles or crushed Oreos (for garnish)
You need just a few simple ingredients to make these Oreo truffles. First, the main star is the Oreo cookies. You will crush these, so they blend well with the cream cheese.
Next, grab 8 ounces of softened cream cheese. This will give the truffles their creamy texture.
You also need 1 cup of semi-sweet chocolate chips. These will coat the truffles and add rich flavor. If you want a smoother melt, you can use 1 tablespoon of coconut oil. This is optional but recommended.
Don’t forget the 1/2 cup of white chocolate chips. You will drizzle this on top for a fun look.
Finally, choose your garnishes. You can use sprinkles or crushed Oreos for an extra touch. These ingredients make your truffles not just tasty but also fun to eat!
Step-by-Step Instructions
Mixing the Base
In a large bowl, combine 36 crushed Oreo cookies and 8 oz of softened cream cheese. Use a fork or a spatula to mix them well. Your goal is to achieve a dough-like consistency. This mixture should hold together when pressed. If it feels too crumbly, mix a little longer.
Shaping the Truffles
Once your mixture is ready, roll it into small balls. Aim for about 1 inch in diameter. Place each ball on a baking sheet lined with parchment paper. After forming all the balls, put the baking sheet in the fridge for 30 minutes. This helps the truffles firm up nicely.
Melting the Chocolate
While the truffles chill, let’s melt the chocolate. Use 1 cup of semi-sweet chocolate chips. You can melt them in a microwave-safe bowl. Heat in 30-second intervals, stirring in between. Alternatively, use a double boiler for even melting. If you want extra smooth chocolate, add 1 tablespoon of coconut oil while melting.
Dipping and Decorating
Once your truffles are chilled, dip each one into the melted chocolate. Make sure each truffle is fully coated. Let any extra chocolate drip off before placing them back on the parchment paper. Now, melt 1/2 cup of white chocolate chips in the same way. Drizzle it over the dipped truffles for decoration. Before the chocolate sets, add sprinkles or crushed Oreos on top for extra flair. Finally, chill the truffles again for 15 minutes to let the chocolate harden.
Tips & Tricks
Perfecting Texture
To get the right texture for your Oreo truffles, mix well. Combine crushed Oreos with softened cream cheese until it forms a dough-like mix. This makes rolling easier. The mixture should hold together without being too sticky.
Chilling the truffles is key. After rolling them into balls, refrigerate for at least 30 minutes. This helps them firm up and keeps their shape when you dip them in chocolate.
Melting Chocolate Successfully
When melting chocolate, you want it smooth and clump-free. Use a microwave-safe bowl. Heat the chocolate chips in 30-second bursts, stirring between each time. This helps prevent burning.
If you want a silkier texture, add coconut oil. This step is optional, but it works wonders. Stir it in with the chocolate chips while they melt.
Creative Decorating Ideas
Get creative with your garnishes. Instead of just sprinkles or crushed Oreos, think of nuts or toasted coconut. These can add fun flavors and textures.
For drizzling, use a fork to create a lovely design. Dip it in melted white chocolate and shake gently to let it flow over the truffles. You can also drizzle dark chocolate for a striking look.
Pro Tips
- Chill Your Truffles: Refrigerating the truffles before dipping helps them maintain their shape and makes coating them easier.
- Use Quality Chocolate: Opt for high-quality chocolate chips for a richer flavor and smoother texture in your truffles.
- Experiment with Flavors: Add a splash of vanilla extract or a pinch of sea salt to the cream cheese mixture for an extra flavor boost.
- Make Ahead: These truffles can be made in advance and stored in the fridge for up to a week, making them perfect for parties!
Variations
Flavor Variations
You can change the flavor of your truffles easily. Try using mint Oreos for a refreshing twist. The mint flavor adds a cool kick that pairs well with chocolate. You can also use peanut butter Oreos for a nutty flavor.
Adding flavor extracts enhances your truffles, too. A drop of vanilla extract can bring warmth. Almond extract adds a unique, sweet note. Just a little goes a long way!
Unique Coatings
The chocolate coating can change the whole look and taste. You can use dark, milk, or white chocolate for dipping. Dark chocolate gives a rich taste, while white chocolate adds sweetness. Each option offers a different flavor experience.
Rolling your truffles in toppings makes them special. Chopped nuts add crunch and flavor. Unsweetened coconut gives a tropical feel. You can even use crushed Oreos as a topping. This adds a fun and tasty finish!
Storage Info
Refrigeration Tips
To keep your Oreo truffles fresh, store them in an airtight container. This helps prevent them from drying out or absorbing other smells in your fridge. You can layer them with parchment paper to avoid sticking. These truffles stay fresh for up to two weeks in the fridge. If you want to enjoy them longer, consider freezing.
Freezing Truffles
Freezing is a great way to save your truffles for later. First, place them on a baking sheet and freeze for about an hour. Once frozen, transfer them to a freezer-safe bag or container. This method keeps them from sticking together. When you're ready to enjoy, move them to the fridge overnight to thaw. For the best taste and texture, eat them within three months after freezing.
FAQs
Can I make these truffles ahead of time?
Yes, you can make these truffles ahead of time. Store them in the fridge for up to a week. Keep them in an airtight container to keep them fresh. If you want to store them longer, you can freeze them for up to three months. Just make sure to thaw them in the fridge before serving.
What can I substitute for cream cheese?
If you need a dairy-free option, you can use dairy-free cream cheese. Other alternatives include Greek yogurt or cashew cream. These options still give a creamy texture without dairy. Just remember that the taste may vary slightly.
How do I get my chocolate to melt smoothly?
To melt chocolate smoothly, use low heat. You can melt it in short bursts in the microwave, stirring often. If you prefer, use a double boiler for even heat. Adding coconut oil helps too. It makes the chocolate smoother and easier to coat your truffles.
What if my truffles are too soft?
If your truffles are too soft, chill them for longer. You can also add more crushed Oreo crumbs to thicken the mixture. Roll them into balls and freeze them for a short time before dipping in chocolate. This will help them hold their shape better.
This blog outlined how to make delicious Oreo truffles. You learned the key ingredients, like Oreo cookies and cream cheese. We went through each step, from mixing to chocolate dipping. I shared tips to perfect texture and create fun variations. Finally, I provided storage advice to keep your truffles fresh.
To sum up, making these treats is simple and fun. Enjoy experimenting with flavors and decorations. Go ahead and impress your friends with these tasty truffles!